You rent a storage unit with the best intentions, and a few boxes later, you have a tiny maze. Months go by, and suddenly you’re standing in front of a locked door, unsure of what’s behind it.
Storage shouldn’t be a black hole for your belongings. It should be a tool, a space that works for you, not against you. The key to achieving this? A clear, well-structured storage inventory paired with smart organization. However, this won’t look like your normal home inventory.
In this guide, we’ll show you how to create an inventory list that actually works, share practical storage unit organization ideas, and help you build a system that stays useful over time because storage should be simple.
How to Create a Storage Inventory List for Your Unit
Creating a storage inventory is about building a system that keeps your belongings accessible, trackable, and protected over time. Here are some of the best steps and practices that will help you stay in control of your storage space from day one.
Step #1: Begin before you pack
The storage inventory process should start before a single item goes into a box. This allows you to sort, document, and label everything while it’s still visible.
Start by grouping your items by category before they go into boxes. This helps you stay organized and makes it easier to track what’s stored where.
The most common categories to use are:
- Kitchenware
- Seasonal Decorations
- Sports Equipment
- Clothing and Textiles
- Electronics and Gadgets
- Important Documents
- Business Inventory
- Collectibles or Memorabilia

Step #2: Choose the right tracking tool
The best inventory system is one you’ll actually use. Choose a tool that fits your level of tech comfort and how often you plan to update the list.
Here are some tools we recommend:
- Spreadsheets (Excel, Google Sheets): Highly customizable and accessible. You can include fields for box ID, item description, quantity, condition, estimated value, and storage location.
- Inventory apps (e.g., Sortly, MyStuff2): These inventory apps allow you to scan barcodes, attach photos, and organize categories visually
- Airtable or Notion: Great for advanced users who want filters, tags, and collaboration features for shared access.
Remember, a well-organized inventory list should serve both short-term convenience and long-term tracking, so choose a format you’ll be motivated to maintain.
Step #3: Document the contents of your storage boxes in detail
Each box’s contents should be listed thoroughly. Don’t settle for vague descriptions like “misc. items” or “living room stuff.” Make sure your labels are detailed and specific enough that you’ll know the contents of the box and their unique requirements just by glancing at their labels.
Some things you can include in your labels are:
- Item names: e.g., “Dyson V8 vacuum” rather than “appliance”
- Category: Tools, holiday décor, electronics, etc.
- Condition: New, used, fragile, etc.
- Quantity: Especially for bulk items like books or utensils
- Owner (if shared unit): Helpful for families or roommates
- Storage notes: e.g., “fragile,” “heavy,” “requires two people to lift”
This level of detail is particularly helpful when locating items, filing insurance claims, or evaluating what’s worth keeping.
Pro Tip: Use weatherproof labels or print your own with a label maker for extra durability, especially in non-climate-controlled units.

Step #4: Take photos or video documentation
A photo-based storage inventory helps you recognize items faster and provides proof of condition. It’s also useful for high-value items or when filing insurance claims.
Take a clear photo of each box’s contents before sealing it. Then, take a photo of the box after labeling it. For fragile or valuable items, capture multiple angles and close-ups.
Save photos in a cloud folder or free storage platforms like Google Drive, Dropbox, or OneDrive alongside your inventory sheet for easy cross-reference. You can also film a short walkthrough of your fully packed unit if space allows.
Step #5: Use the first in, first out (FIFO) method
The first in, first out principle, commonly used in inventory management and warehousing, is a powerful way to avoid forgotten items and wasted space. This method is especially useful for items with a shelf life, like seasonal décor, documents, or business inventory.
Here’s how to apply FIFO to your storage unit:
- Place older items toward the front of the unit so they’re more accessible
- Put newer, less urgently needed items toward the back
- Date-stamp boxes or inventory entries to track when items were stored
Step #6: Map the unit
Create a simple diagram of your storage layout. This doesn’t need to be fancy. A quick sketch that shows where each group of items or numbered boxes is located will do.
Include this map with your inventory file. It helps you (or anyone else with access) retrieve items faster without having to move everything around.
Pro tip: Tape a printed copy of the map just inside the unit door for quick reference.
Step #7: Conduct regular audits and update as you go
A static inventory quickly becomes outdated. So, every time you add, remove, or swap something out, update your storage inventory records. You can even set a reminder every 3–6 months for a mini audit.
During an audit, check for:
- Missing or damaged items
- Outdated categories
- Items you no longer need and can be discarded or donated
Staying proactive like this keeps your inventory accurate and your storage functional long-term.
Step #8: Create backups for your inventory
Even the most detailed list won’t help if it’s lost in a system crash or a misplaced notebook. Keep your inventory secure by backing it up in multiple formats.
For digital inventories, save it to the cloud (Google Drive, Dropbox, etc.) and download a local copy to a second device or hard drive. For printed inventories, keep one copy in the unit and one in a binder at home. You can also take photos of the document or scan it.
This extra step ensures that, in any situation, you have quick access to your storage data when you need it most.
Storage Unit Organization Ideas That Actually Work
Keeping your self-storage unit organized saves you time, prevents damage, and makes future access so much easier. So, here are some of the best tips designed specifically for self-storage users who want to keep things in order long-term.
-
Use clear, stackable storage bins
Instead of cardboard boxes, use clear, stackable storage bins to store your items. Clear containers allow you to see the contents without opening them, making retrieval faster and easier.It’s also better to choose uniformly sized bins to make stacking safer and more stable. Not only does this reduce wasted space, but it also prevents any leaning effect that can cause collapses.
-
Install adjustable shelving units
Invest in freestanding shelving units, especially if you’re storing a mix of heavy items, bins, and fragile boxes. Wire racks or modular plastic shelves are great for damp environments and easy to move. Adjustable shelves allow you to customize the layout as your inventory evolves.Set heavier items or bins with frequent-use contents on waist-level shelves, while lighter or long-term items go higher.
-
Store items vertically and use corners smartly
Use your unit’s vertical space to your advantage. Use vertical shelving or pegboards to hang tools, cords, or sports equipment. And if possible, stand furniture like mattresses when safeAlso, make use of your corners. Tuck narrow items like skis, umbrellas, brooms, or framed art there or place vertical bins in corners to stabilise stacks
-
Use drawer organizers or compartmentalized bins
For small items such as electronics, tools, craft supplies, cables, use drawer organizers, small tackle boxes, or sectioned bins to keep everything visible and untangled.Use ziplock bags or small containers within larger bins to break down categories. Label each compartment if needed
This is especially useful when storing items like:
- Cords and chargers
- Stationery
- Makeup or jewelry
- Hardware (screws, nails, batteries)
Do this consistently and you can avoid your storage unit turning into one massive junk drawer.
-
Hang items to free up floor space
Hooks, over-the-door hangers, utility pegboards, and other hanging storage unit organization solutions help lift clutter off the floor. Hang items such as:- Foldable chairs
- Bags or luggage
- Tools
- Extension cords or hoses
You can affix these to freestanding shelves, or use removable wall hooks if the facility allows. Just make sure the hook system is strong enough for the weight.
Note: Don’t hang heavy items directly from the unit’s walls unless approved. Damaging the facility’s structure may breach your rental agreement.
-
Use your furniture as functional storage
If you're storing large furniture like dressers, cabinets, or bookshelves, use them as extra storage space. But, choose the items you’re storing within them carefully.
For instance, fill drawers with linens or clothing. You can also store flat items such as mirrors or frames between mattresses or along furniture backs for protection and space-saving.
-
Avoid overpacking and prioritize safety
An overstuffed unit may seem efficient, but it can be dangerous and counterproductive. Items could fall, become crushed, or block air circulation. Leave space between items and walls to allow air flow. Also, don’t stack higher than your shoulder unless you’re using secure shelving.It’s also best to leave a clear center aisle or side path so you can walk through and access everything without unloading half the unit
Pro-tip: Use the U-shaped layout (items along three walls) to maximize space and movement.
How to Maintain Your Storage and Inventory System Long-Term
Creating an organized storage unit with a detailed inventory is a major win but keeping it that way is where the real payoff lies. Here's how to make your storage and inventory setup truly sustainable.
#1: Start with a maintenance mindset
Instead of treating your storage unit as a set-and-forget solution, think of it as a dynamic part of your life, one that needs occasional attention, just like your wardrobe, pantry, or home office. This mindset shift makes it easier to see maintenance not as a chore, but as a low-effort investment in keeping your life organized.
#2: Establish a routine review cycle
Set reminders in your calendar to review your unit every three to six months. During these visits, check the condition of your boxes and containers, reassess whether certain items are still worth keeping, and update your inventory if anything has been added or removed.
To naturally align these reviews to your lifestyle, schedule them with natural changes in your life such as seasonal changes or holidays to make the process intuitive and harder to forget.
#3: Create accountability for updates
It’s easy to tell yourself you’ll update your inventory later, but we all know how that goes. To make updates stick, build accountability into your process.
One approach is to establish a simple rule. Every time you access your unit, take five minutes to log what was added, taken, or moved. If you're using digital inventory software or spreadsheets, enable edit histories or collaborate with others who also access the unit.
These small habits help prevent inventory chaos from creeping in again.
#4: Integrate inventory into your broader life system
Bring your inventory system into the tools you already use. Link it to your cloud storage (like Google Drive), include it in your household management files, or even keep a copy with your insurance documents for easier claims processing.
This integration makes your inventory not only easier to find and maintain, but also more useful when you actually need it

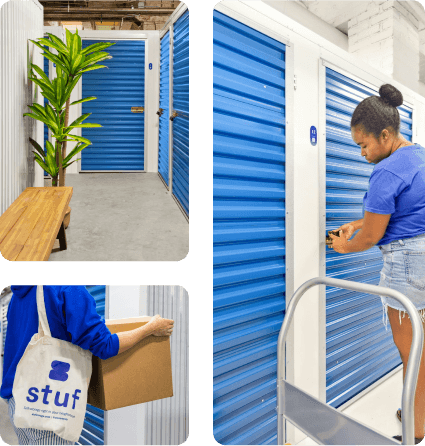
Smart Storage Starts with the Right Partner
Creating an efficient storage and inventory system takes planning, consistency, and the right setup but your efforts can only go so far without a reliable storage provider. A well-organized system works best when supported by a facility designed to accommodate it. That’s what Stuf Storage provides.
With secure, tech-enabled spaces housed in underutilized commercial buildings, Stuf offers a smarter solution for modern storage needs. Each location is designed with accessibility, cleanliness, and security in mind, making it easier to implement and maintain the organization strategies covered in this guide.
If you’re looking to elevate your storage experience, Stuf Storage delivers the structure and flexibility that long-term organization requires. Find a unit near you now!

.png)
%20(1).png)
.png)